Food Photography: Making Food Look Delicious
Food photography is an art. It's about capturing the essence of a dish, making it look irresistible to the viewer. From mastering lighting techniques to understanding composition and styling, this guide dives deep into the world of food photography, providing you with the knowledge and tips to create stunning visuals that will make mouths water. We'll also explore recommended gear and how to choose the right equipment for your specific needs and budget.
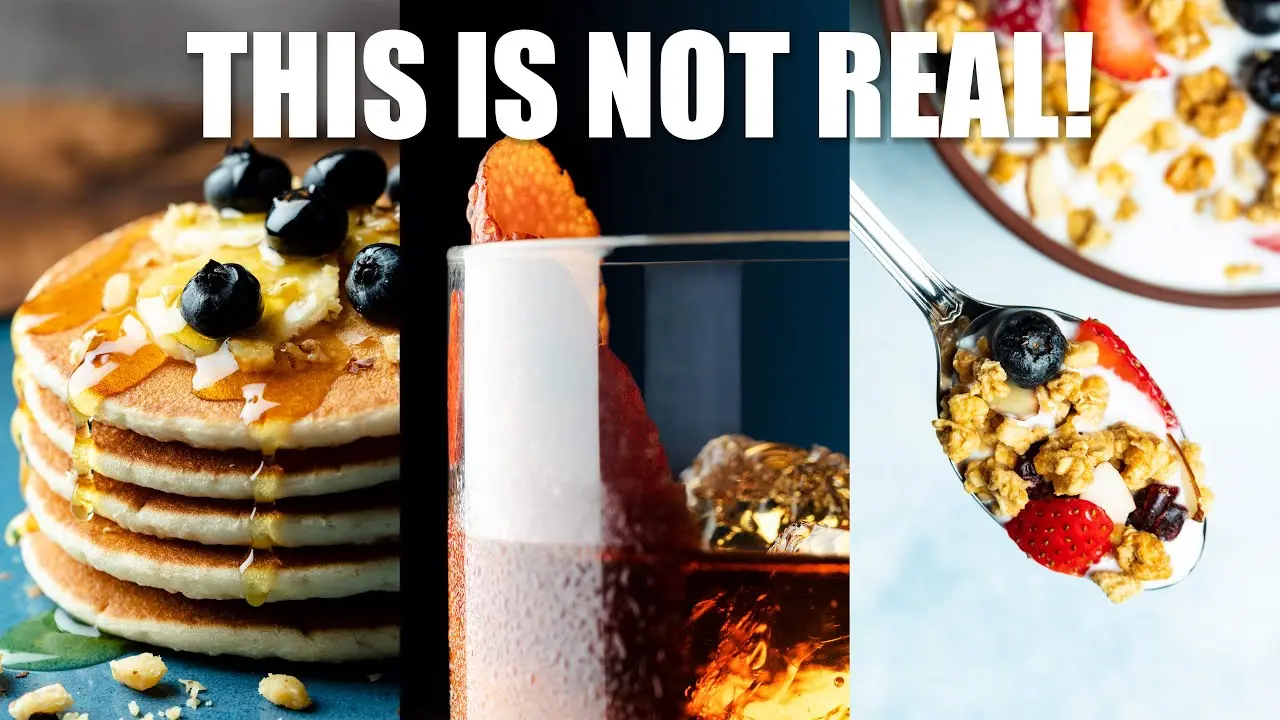
So, you want to take drool-worthy pictures of food? Awesome! Let's ditch the boring snapshots and dive into the world of making grub look absolutely scrumptious. Forget stiff poses and clinical lighting; we're aiming for mouthwatering magic. This isn't just about pointing and shooting; it's about telling a story, evoking a feeling, and making someone crave that dish. Think of it like this: you're not just photographing food; you're photographing an experience.
Understanding Food Photography Lighting Techniques
Lighting is your best friend (or worst enemy) in food photography. Natural light is generally the go-to, especially for beginners. Find a window with soft, diffused light. Think overcast days or a window facing north. Direct sunlight can create harsh shadows, which we definitely want to avoid. If you're shooting indoors, consider investing in a good softbox or reflector to control the light.
Natural Light: The King (or Queen)
Position your food near a window and experiment with different angles. Notice how the light changes throughout the day. Morning and late afternoon light are usually the most flattering. Use a white reflector to bounce light back onto the darker side of your dish, filling in those pesky shadows.
Artificial Light: When the Sun Goes Down
Don't despair if natural light isn't an option! A softbox can mimic the soft, diffused light of a window. Experiment with different positions and angles. A single light source is generally best for food photography, as multiple lights can create confusing shadows.
Light Modifiers: Reflectors and Diffusers
Reflectors bounce light back onto your subject, brightening the shadows and adding dimension. Diffusers soften the light, creating a more even and flattering look. These are inexpensive but essential tools for any food photographer.
Mastering Food Photography Composition and Styling
Composition is how you arrange the elements within your frame. Styling is how you present the food itself. Both are crucial for creating visually appealing images. Think about the story you want to tell. Are you going for rustic and homey, or sleek and modern?
The Rule of Thirds: A Classic for a Reason
Imagine your frame divided into nine equal parts by two horizontal and two vertical lines. Place your key elements along these lines or at their intersections. This creates a more balanced and visually interesting composition.
Negative Space: Give Your Food Room to Breathe
Don't overcrowd your frame. Leave some empty space around your subject to draw the viewer's eye to the food. This also creates a sense of calm and sophistication.
Color Theory: Make Your Food Pop
Use complementary colors to create visual contrast and make your food stand out. For example, a red strawberry looks great against a green background. Pay attention to the colors of your props and backgrounds.
Food Styling Tips: Making It Look Delicious
Fresh herbs, a sprinkle of salt, a drizzle of sauce – these small details can make a big difference. Don't be afraid to get messy! A little imperfection can add character and authenticity. Consider the texture of your food. Is it crunchy, creamy, or smooth? Highlight these textures in your styling.
Recommended Food Photography Gear: Cameras, Lenses, and More
You don't need the most expensive gear to take great food photos. But having the right equipment can definitely make a difference. Let's break down the essentials:
Cameras: From Smartphones to DSLRs
You can absolutely take stunning food photos with your smartphone, especially with newer models. Look for phones with good low-light performance and manual controls. However, a DSLR or mirrorless camera offers more flexibility and control. Look for cameras with interchangeable lenses and good image quality.
Lenses: The Key to Sharpness and Depth of Field
A macro lens (typically around 50mm-100mm) is ideal for food photography, allowing you to capture incredible detail. A prime lens (a lens with a fixed focal length) is often sharper than a zoom lens. A 50mm lens is a great starting point.
Tripods: Stability is Key
A tripod is essential for shooting in low light or when you need to use a slow shutter speed. It also helps you maintain a consistent composition.
Lighting Equipment: Softboxes and Reflectors
As mentioned earlier, softboxes and reflectors are crucial for controlling the light. A softbox diffuses the light, creating a softer and more even illumination. A reflector bounces light back onto your subject, filling in shadows.
Specific Product Recommendations: Gear for Different Budgets
Okay, let's get down to specifics. Here are a few product recommendations for different budgets:
Budget-Friendly Options (Under $500):
- Camera: Used Canon EOS Rebel T6 (around $300). A great entry-level DSLR with good image quality.
- Lens: Yongnuo 50mm f/1.8 Lens ($70). A cheap but surprisingly good prime lens.
- Lighting: Neewer 24" Softbox ($30). A basic but effective softbox for artificial lighting.
- Tripod: AmazonBasics Lightweight Tripod ($30). A stable and affordable tripod.
Mid-Range Options ($500 - $1500):
- Camera: Sony a6000 (around $600, body only). A popular mirrorless camera with excellent image quality and autofocus.
- Lens: Sony 50mm f/1.8 Lens ($250). A sharp and versatile prime lens for Sony cameras.
- Lighting: Godox SL-60W LED Video Light with Softbox ($150). A powerful and versatile LED light with adjustable brightness.
- Tripod: Manfrotto Compact Action Tripod ($80). A sturdy and reliable tripod.
High-End Options (Over $1500):
- Camera: Canon EOS 5D Mark IV (around $2500, body only). A professional-grade DSLR with exceptional image quality and performance.
- Lens: Canon EF 100mm f/2.8L Macro IS USM Lens ($900). A top-of-the-line macro lens for capturing incredible detail.
- Lighting: Profoto B10 Plus OCF Flash Head ($2200). A powerful and portable studio flash with exceptional light quality.
- Tripod: Really Right Stuff TVC-24L Tripod ($900). An incredibly stable and durable tripod for professional use.
Using Food Photography Gear in Different Scenarios
The best gear for you depends on your specific needs and shooting environment. Here are a few examples:
Shooting at Home with Natural Light:
A smartphone or entry-level DSLR with a 50mm lens, a reflector, and a tripod are all you need to get started. Position your food near a window and use the reflector to bounce light back onto the subject.
Shooting in a Restaurant:
Low-light performance is crucial in restaurants. A camera with a fast lens (f/1.8 or faster) and a tripod are essential. Consider using a small LED light to add some fill light.
Shooting in a Studio:
A DSLR or mirrorless camera with a macro lens and studio lighting equipment (softboxes, strobes, etc.) will give you the most control over your images.
Comparing Different Products: Making the Right Choice
Choosing the right gear can be overwhelming. Here's a quick comparison of some popular options:
Canon EOS Rebel T6 vs. Sony a6000:
The Canon EOS Rebel T6 is a great entry-level DSLR, while the Sony a6000 is a more advanced mirrorless camera. The a6000 has better image quality, autofocus, and video capabilities, but it's also more expensive. The T6 is a good option for beginners on a tight budget.
Yongnuo 50mm f/1.8 vs. Canon EF 50mm f/1.8:
The Yongnuo 50mm f/1.8 is a much cheaper alternative to the Canon EF 50mm f/1.8. While the Yongnuo lens is not as sharp or well-built as the Canon lens, it's a great option for beginners who want to experiment with prime lenses without breaking the bank.
Neewer Softbox vs. Godox SL-60W LED Video Light with Softbox:
The Neewer softbox is a simple and affordable option for diffusing light. The Godox SL-60W is a more powerful and versatile LED light with adjustable brightness. The Godox is a better option for those who need more control over their lighting.
Understanding Pricing and Value: Getting the Best Bang for Your Buck
Food photography gear can range from incredibly affordable to eye-wateringly expensive. It's essential to understand what you're paying for and whether the investment is worth it for your specific needs.
Price vs. Performance:
Often, you get what you pay for. More expensive cameras and lenses generally offer better image quality, build quality, and features. However, that doesn't mean you need to spend a fortune to take great food photos. A good understanding of lighting, composition, and styling can often compensate for less expensive gear.
Used vs. New:
Buying used gear can be a great way to save money. Check reputable online marketplaces and camera stores for used cameras, lenses, and other equipment. Just be sure to inspect the gear carefully before buying it.
Renting Gear:
Renting gear is a great way to try out different cameras and lenses before you buy them. It's also a good option for occasional shoots where you need a specific piece of equipment that you don't own.
So there you have it! A deep dive into food photography. Now get out there, experiment, and start creating some delicious-looking images!
:max_bytes(150000):strip_icc()/277019-baked-pork-chops-with-cream-of-mushroom-soup-DDMFS-beauty-4x3-BG-7505-5762b731cf30447d9cbbbbbf387beafa.jpg)