Advanced Lightroom Techniques: Mastering the Tone Curve
Let's dive deep into the world of Lightroom and explore how the Tone Curve can become your best friend for crafting stunning images. We'll go beyond the basics, uncovering advanced techniques and real-world applications. Plus, we'll check out some gear recommendations to boost your editing workflow and ultimately, elevate your photography game.

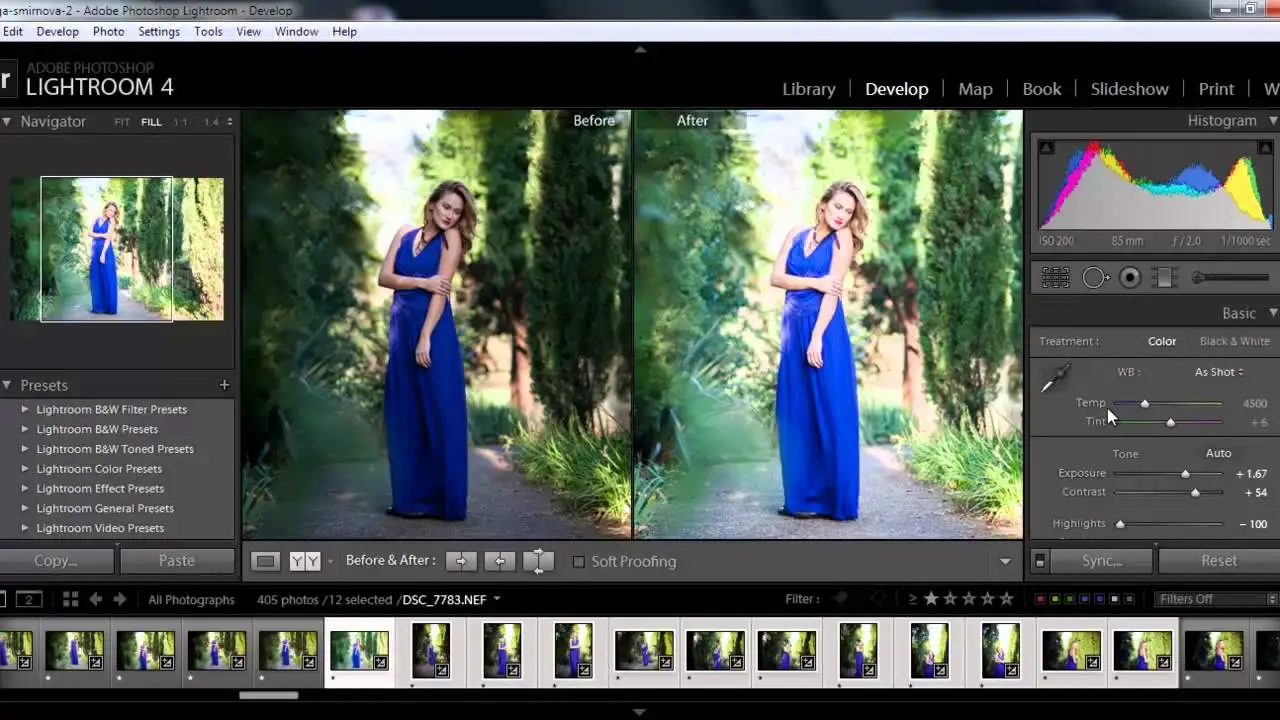
The Tone Curve in Lightroom is arguably one of the most powerful tools available to photographers. It allows for incredibly precise control over the tonal range of your images, far beyond what basic sliders like Exposure and Contrast can achieve. This article will explore advanced techniques for using the Tone Curve, providing practical examples and real-world scenarios to help you master this crucial aspect of photo editing. We'll also touch upon some essential hardware and software that can enhance your Lightroom workflow.
Understanding the Tone Curve A Deep Dive into Lightroom Adjustments
Before we jump into advanced techniques, let's quickly recap the basics. The Tone Curve is a graphical representation of the tonal range in your image. The horizontal axis represents the input tones (blacks on the left, whites on the right), and the vertical axis represents the output tones. By manipulating the curve, you can remap the tones in your image, making them brighter, darker, or more contrasty.
The Tone Curve panel in Lightroom typically offers two modes: the Point Curve and the Parametric Curve. The Point Curve allows for freeform adjustments, while the Parametric Curve provides more structured controls over highlights, lights, darks, and shadows. While the Parametric Curve is useful for broad adjustments, the Point Curve offers the most precise control.
Advanced Tone Curve Techniques for Photo Editing in Lightroom
Creating S Curves for Enhanced Contrast and Visual Appeal
The S curve is a classic technique for adding contrast to an image. By pulling down the shadows (the lower left portion of the curve) and pushing up the highlights (the upper right portion), you create a distinctive S shape. This increases the difference between the darkest and brightest areas of your image, resulting in a more visually engaging photograph.
Experiment with different levels of S curvature to achieve the desired effect. A subtle S curve can add a touch of punch, while a more aggressive curve can create a dramatic, high-contrast look. Be mindful of clipping (losing detail in the highlights or shadows) when applying extreme curves.
Fading the Shadows for a Film Look in Lightroom
To achieve a soft, film-like aesthetic, try fading the shadows. This involves lifting the black point of the Tone Curve, making the darkest areas of your image appear slightly brighter and less harsh. This technique can be particularly effective for portraits and landscapes.
To fade the shadows, grab the lower left point of the Tone Curve and drag it slightly upwards. The exact amount of lift will depend on the image, but a small adjustment is usually sufficient. This subtle tweak can create a more ethereal and nostalgic feel.
Targeted Color Adjustments Using the Tone Curve Channels
The Tone Curve isn't just for adjusting overall brightness and contrast; it can also be used to make targeted color adjustments. By switching to the Red, Green, or Blue channels in the Tone Curve panel, you can independently adjust the color balance in different tonal ranges.
For example, you could add warmth to the highlights by increasing the red and yellow in the upper right portion of the Red channel. Or, you could cool down the shadows by adding blue to the lower left portion of the Blue channel. This level of control allows for incredibly nuanced and creative color grading.
Creating a Matte Effect with the Tone Curve for Unique Styles
The matte effect is a popular style that gives images a desaturated and slightly faded appearance. This can be achieved by lifting the black point and lowering the white point on the Tone Curve, effectively reducing the overall dynamic range. This works great for lifestyle and portrait photography.
To create a matte effect, gently lift the bottom left of the curve and bring the top right of the curve down slightly. Experiment with the curve's shape until you achieve the desired level of matte. This is often combined with desaturation for a complete look.
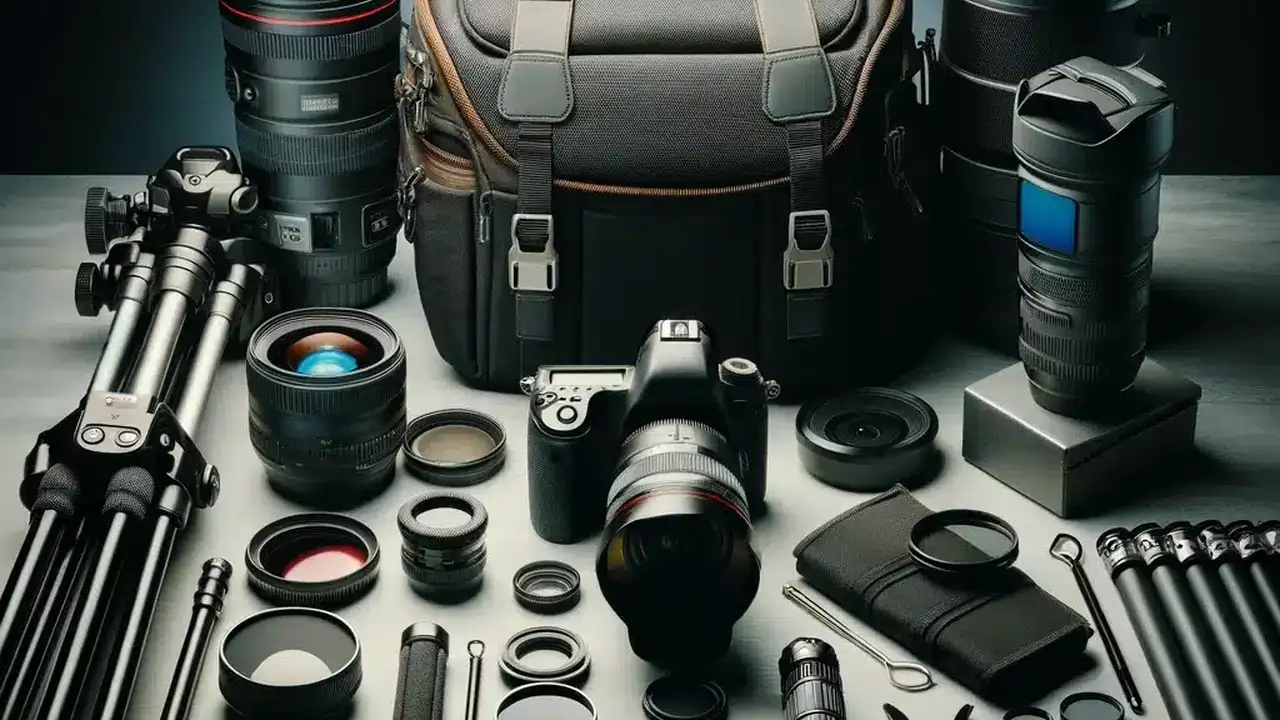
Gear Recommendations to Enhance Your Lightroom Workflow and Editing Speed
While Lightroom is powerful software, having the right hardware and accessories can significantly improve your editing workflow and overall experience. Here are some recommendations for gear that can help you master the Tone Curve and other advanced Lightroom techniques.
Graphics Tablets Wacom Intuos Pro and Alternatives for Precise Control
A graphics tablet, such as the Wacom Intuos Pro (ranging from $250 - $500 depending on size), offers much greater precision than a mouse when working with the Tone Curve. The pressure sensitivity allows you to make subtle adjustments with ease, and the pen provides a more natural and intuitive feel. Alternatives include the XP-Pen Deco Pro (around $100) and Huion Inspiroy Q11K V2 (around $150), offering similar functionality at a lower price point.
Use Case: When making fine adjustments to the Tone Curve, especially when targeting specific areas of an image, a graphics tablet provides unparalleled control. For example, when dodging and burning (selectively lightening and darkening areas) using the Tone Curve, a tablet allows for smooth and gradual transitions.
Comparison: While a mouse is adequate for basic Tone Curve adjustments, a graphics tablet offers significantly improved precision and control. The pressure sensitivity of the pen allows you to vary the intensity of your adjustments, something that is not possible with a mouse. Tablets are also more ergonomic, reducing strain on your wrist and hand during long editing sessions.
Color Calibrated Monitors BenQ SW270C and Eizo ColorEdge Series for Accurate Color Representation
A color-calibrated monitor is essential for accurate color representation. Without it, you may be making adjustments based on inaccurate color information, leading to inconsistent results. The BenQ SW270C (around $800) and the Eizo ColorEdge series (ranging from $1,000 to $3,000) are excellent choices for photographers and graphic designers.
Use Case: When adjusting the color channels in the Tone Curve, a color-calibrated monitor ensures that you are seeing accurate color information. This is crucial for achieving consistent and predictable results across different devices and platforms.
Comparison: Standard monitors often have inaccurate color representation, which can lead to inconsistent results when editing photos. A color-calibrated monitor provides a more accurate and reliable representation of colors, allowing you to make informed adjustments.
External Hard Drives and SSDs SanDisk Extreme Pro Portable SSD for Fast and Reliable Storage
Fast and reliable storage is crucial for handling large Lightroom catalogs and high-resolution images. An external SSD, such as the SanDisk Extreme Pro Portable SSD (around $200 for 1TB), offers significantly faster read and write speeds than traditional hard drives, improving overall Lightroom performance.
Use Case: Storing your Lightroom catalog and image files on an external SSD can drastically reduce loading times and improve overall performance, especially when working with large files or complex edits. This is particularly beneficial when using the Tone Curve for targeted adjustments, as it allows for smoother and more responsive editing.
Comparison: Traditional hard drives are slower and more prone to failure than SSDs. An SSD provides significantly faster read and write speeds, improving overall Lightroom performance and reducing the risk of data loss.
Software Plugins Nik Collection and Exposure X7 for Additional Creative Options
While Lightroom's Tone Curve is powerful, software plugins can provide additional creative options and streamline your workflow. The Nik Collection (around $150) and Exposure X7 (around $200) offer a range of filters and effects that can be used in conjunction with the Tone Curve to achieve unique and creative looks.
Use Case: Plugins can be used to enhance the effects achieved with the Tone Curve. For example, you could use a plugin to add film grain or create a vintage look after making basic tonal adjustments with the Tone Curve.
Comparison: While Lightroom's built-in tools are powerful, plugins offer additional creative options and can streamline your workflow. They can also provide access to specialized effects and filters that are not available in Lightroom.
:max_bytes(150000):strip_icc()/277019-baked-pork-chops-with-cream-of-mushroom-soup-DDMFS-beauty-4x3-BG-7505-5762b731cf30447d9cbbbbbf387beafa.jpg)