Cropping and Straightening in Lightroom
Let's dive into the world of Lightroom and explore the essential tools for cropping and straightening your photos. Mastering these techniques can dramatically improve your images, transforming mundane shots into visually appealing masterpieces. We'll cover everything from the basics to more advanced tips, including product recommendations and real-world usage scenarios, all while keeping SEO best practices in mind. So, buckle up and get ready to perfect your photo editing skills.

Cropping and straightening are two of the most fundamental yet powerful tools available in Adobe Lightroom. They're often the first adjustments photographers make to their images, and for good reason. They can dramatically improve composition, correct perspective, and ultimately enhance the visual impact of your photos. This article will guide you through the ins and outs of these essential techniques, providing practical advice, real-world examples, and product recommendations to help you master them.
Understanding the Crop Tool in Lightroom Classic for Improved Composition
The Crop tool in Lightroom Classic is your go-to for refining the composition of your images. It allows you to remove unwanted elements, emphasize key subjects, and create a more visually balanced photograph. To access the Crop tool, simply press the "R" key or click on the Crop icon in the Develop module's toolbar. Once activated, a bounding box appears around your image, allowing you to adjust the crop area.
Aspect Ratio: Understanding aspect ratios is crucial for effective cropping. Common aspect ratios include 1:1 (square), 4:3 (standard digital camera), 3:2 (DSLR), and 16:9 (widescreen). Lightroom provides a range of preset aspect ratios, or you can create your own custom ratios. Consider where your image will be used (e.g., print, social media, website) when choosing an aspect ratio. For example, Instagram prefers square or portrait orientations, while website banners often use wider aspect ratios.
Crop Overlay Tool and Guides: Lightroom offers several overlay guides to assist with composition. These include the Rule of Thirds, Grid, Diagonal, Triangle, Golden Ratio, and Golden Spiral. The Rule of Thirds is arguably the most popular, dividing the image into nine equal parts by two horizontal and two vertical lines. Placing key elements along these lines or at their intersections can create a more dynamic and engaging composition. The Golden Ratio and Golden Spiral are based on mathematical principles that create harmonious and visually pleasing arrangements. Experiment with different overlays to see which works best for your image.
Practical Cropping Examples:
- Removing Distractions: Imagine you've captured a stunning landscape, but there's a distracting object in the foreground, like a stray branch or a piece of litter. The Crop tool allows you to easily remove these distractions, focusing the viewer's attention on the main subject.
- Improving Composition: Perhaps your subject is slightly off-center, making the image feel unbalanced. By using the Crop tool and the Rule of Thirds overlay, you can reposition the subject to create a more visually appealing composition.
- Creating a Panorama: You can use the Crop tool to create a panoramic image from a standard photograph. Simply crop the image to a wider aspect ratio, such as 16:9 or 21:9, to create a panoramic effect.
Straightening Tools and Techniques for Correcting Perspective in Lightroom
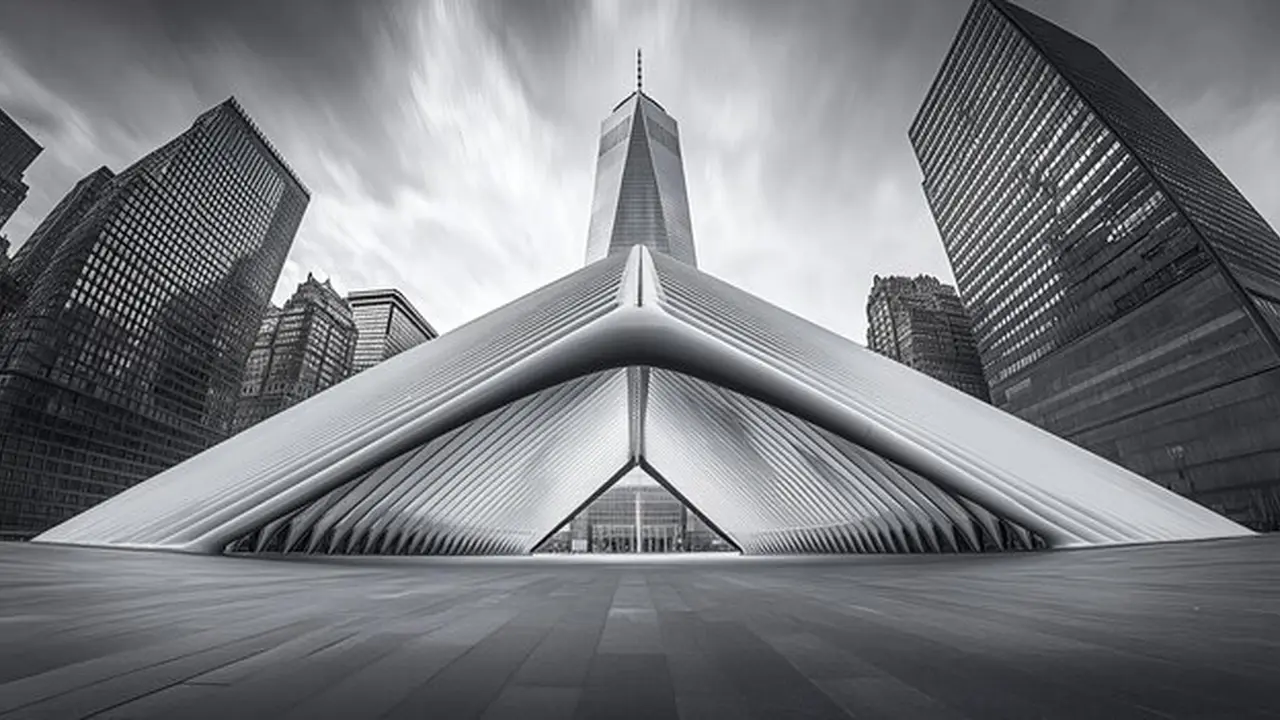
The Straighten tool in Lightroom is essential for correcting tilted horizons and converging vertical lines. A crooked horizon can instantly detract from an otherwise great photograph. Similarly, converging vertical lines, often seen in architectural photography, can make buildings appear to lean or distort. Lightroom provides several tools to address these issues.
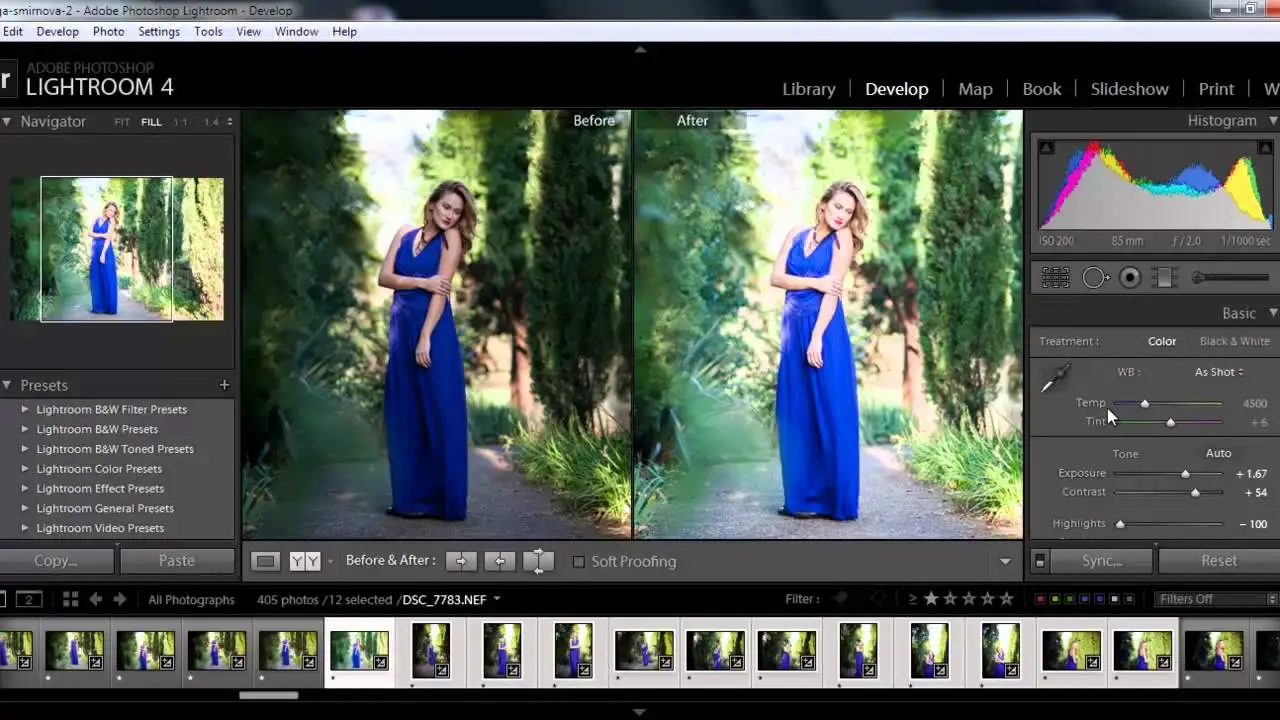
Automatic Straightening: Lightroom's automatic straightening feature can often correct minor tilts with a single click. In the Crop tool panel, simply click the "Auto" button. Lightroom will analyze the image and automatically rotate it to level the horizon. While this works well in many cases, it's not always perfect and may require manual adjustments.
Manual Straightening: For more precise control, you can manually straighten your images using the angle slider or the straighten tool. The angle slider allows you to rotate the image by a specific degree. The straighten tool lets you draw a line along what should be a horizontal or vertical edge, and Lightroom will automatically rotate the image to align with that line. This is particularly useful for straightening horizons or aligning buildings.
Upright Tool for Perspective Correction: Lightroom's Upright tool is specifically designed for correcting converging vertical lines in architectural photography. It offers four modes: Auto, Level, Vertical, and Full.
- Auto: Analyzes the image and applies both vertical and horizontal corrections.
- Level: Corrects only horizontal perspective, leveling the horizon.
- Vertical: Corrects only vertical perspective, straightening vertical lines.
- Full: Applies both vertical and horizontal corrections, as well as distortion correction.
Practical Straightening Examples:
- Correcting a Tilted Horizon: If you've taken a landscape photo with a slightly tilted horizon, use the Straighten tool to level the horizon and create a more balanced image.
- Straightening Buildings: When photographing buildings, use the Upright tool to correct converging vertical lines and make the buildings appear straight and upright.
- Fixing Perspective Distortion: Wide-angle lenses can often cause perspective distortion, making objects appear warped or stretched. The Upright tool can help correct this distortion and create a more natural-looking image.
Advanced Cropping and Straightening Techniques for Professional Results
Beyond the basics, there are several advanced techniques you can use to further refine your cropping and straightening skills. These techniques involve using a combination of tools and adjustments to achieve specific results.
Content-Aware Fill for Expanding Cropped Areas: In some cases, you may want to crop an image in a way that removes important details. Lightroom's Content-Aware Fill feature can help you expand the cropped area by intelligently filling in the missing pixels. This is particularly useful for removing unwanted objects or extending the background of an image. To use Content-Aware Fill, select the Heal tool and choose "Content-Aware Fill" from the mode dropdown. Then, paint over the area you want to fill, and Lightroom will automatically generate the missing pixels based on the surrounding content. This feature is available in newer versions of Lightroom.
Using Adjustment Brushes for Localized Corrections: Adjustment brushes allow you to apply cropping and straightening adjustments to specific areas of your image. This is useful for correcting perspective or removing distractions in localized areas without affecting the entire image. For example, you could use an adjustment brush to straighten a leaning building in the background without affecting the rest of the scene.
Combining Cropping and Straightening with Other Adjustments: Cropping and straightening are often just the first steps in the editing process. It's important to combine these adjustments with other adjustments, such as exposure, contrast, and color correction, to achieve the best possible results. For example, after cropping and straightening an image, you might want to adjust the exposure to brighten the image or adjust the color balance to correct any color casts.
Lightroom Presets for Streamlining Your Cropping and Straightening Workflow
Presets can be a huge time-saver, especially when you're working with a large number of images. You can create and save your own custom presets for cropping and straightening, or you can download presets from other photographers. These presets can be applied to multiple images with a single click, ensuring consistency and saving you valuable time. Look for presets specifically designed for architectural photography or landscape photography, as these often include cropping and straightening adjustments.
Product Recommendations: Monitors and Styluses for Enhanced Precision
The right equipment can make a significant difference in your editing workflow. Here are a few product recommendations to enhance your precision and efficiency when cropping and straightening in Lightroom:
Monitors:
- Eizo ColorEdge CS2740: This high-end monitor offers exceptional color accuracy and a wide color gamut, making it ideal for professional photographers and graphic designers. It features a 27-inch 4K UHD display, ensuring sharp and detailed images. The Eizo ColorEdge CS2740 typically retails for around $2000. Use case: color-critical work where accuracy is paramount.
- BenQ SW270C: A more affordable option that still offers excellent color accuracy and a wide color gamut. It features a 27-inch QHD display and includes hardware calibration, ensuring consistent color performance. The BenQ SW270C typically retails for around $800. Use case: general photo editing and print preparation.
- Dell UltraSharp U2720Q: A versatile monitor that offers a good balance of performance and price. It features a 27-inch 4K UHD display and includes a USB-C port for easy connectivity. The Dell UltraSharp U2720Q typically retails for around $600. Use case: everyday photo editing and office work.
Styluses:
- Wacom Intuos Pro: The industry standard for graphics tablets, the Wacom Intuos Pro offers exceptional precision and control. It features a pressure-sensitive pen and customizable buttons, allowing you to fine-tune your editing workflow. The Wacom Intuos Pro comes in various sizes and typically retails for around $400. Use case: detailed retouching and precise adjustments.
- XP-Pen Deco Pro: A more affordable alternative to the Wacom Intuos Pro, the XP-Pen Deco Pro offers similar features at a lower price. It features a pressure-sensitive pen and a tilt function, allowing you to create natural-looking brushstrokes. The XP-Pen Deco Pro typically retails for around $100. Use case: general photo editing and digital painting.
- Apple Pencil (with iPad Pro): If you're an iPad Pro user, the Apple Pencil is a fantastic tool for editing photos on the go. It offers excellent precision and responsiveness, making it ideal for cropping, straightening, and other adjustments. The Apple Pencil typically retails for around $130. Use case: mobile photo editing and sketching.
Comparing Products: Choosing the Right Tools for Your Needs
When choosing a monitor or stylus for photo editing, consider your budget, your workflow, and your specific needs. High-end monitors like the Eizo ColorEdge CS2740 offer the best possible color accuracy, but they come at a premium price. More affordable options like the BenQ SW270C and Dell UltraSharp U2720Q still offer excellent performance for most users. Similarly, the Wacom Intuos Pro is the gold standard for graphics tablets, but the XP-Pen Deco Pro offers a great alternative at a lower price. If you're primarily editing photos on an iPad Pro, the Apple Pencil is a must-have accessory.
Real-World Usage Scenarios: Examples of Cropping and Straightening in Action
Let's look at a few real-world usage scenarios to illustrate the power of cropping and straightening:
- Landscape Photography: Imagine you've captured a stunning sunset over the ocean, but the horizon is slightly tilted. By using the Straighten tool, you can level the horizon and create a more balanced and visually appealing image. You can then use the Crop tool to remove any distracting elements in the foreground and emphasize the vibrant colors of the sky.
- Architectural Photography: When photographing buildings, the Upright tool is essential for correcting converging vertical lines. By using the Upright tool, you can make the buildings appear straight and upright, creating a more professional and polished image. You can also use the Crop tool to remove any unwanted elements, such as power lines or street signs.
- Portrait Photography: Cropping can be used to improve the composition of portrait photographs. By cropping in on the subject's face, you can emphasize their expression and create a more intimate and engaging portrait. You can also use cropping to remove any distracting elements in the background.
By mastering the art of cropping and straightening, you can dramatically improve the quality of your photos and create images that are both visually appealing and technically sound. Experiment with different techniques, find the tools that work best for you, and practice regularly to hone your skills.
:max_bytes(150000):strip_icc()/277019-baked-pork-chops-with-cream-of-mushroom-soup-DDMFS-beauty-4x3-BG-7505-5762b731cf30447d9cbbbbbf387beafa.jpg)