Architectural Photography: Capturing Buildings and Structures
Architectural photography is more than just pointing a camera at a building; it's about telling a story, capturing the essence of a structure, and showcasing its unique design. This guide dives deep into the world of architectural photography, covering essential techniques, equipment recommendations, and practical tips for capturing stunning images of buildings and structures. We'll explore various approaches to architectural photography, from capturing grand facades to highlighting intricate details, and provide insights into how different lenses and camera settings can impact your results. Get ready to elevate your architectural photography game and create images that truly stand out.
Understanding Architectural Photography Techniques and Composition
Architectural photography demands a keen eye for detail and a solid understanding of composition. It's not just about capturing what you see; it's about translating the three-dimensional world onto a two-dimensional surface in a way that's both visually appealing and informative. Let's explore some key techniques:
Lines, Shapes, and Forms in Architectural Photography
Buildings are inherently geometric, and understanding how to utilize lines, shapes, and forms is crucial. Look for leading lines that draw the viewer's eye into the image, emphasizing depth and perspective. Notice how different shapes – squares, rectangles, circles, triangles – interact with each other and contribute to the overall design. Pay attention to the form of the building, its overall shape and structure, and how light interacts with it to create shadows and highlights.
Symmetry and Asymmetry in Building Photography
Symmetry can create a sense of order and balance, while asymmetry can add dynamism and visual interest. Many buildings are designed with symmetrical facades, offering opportunities for classic, balanced compositions. However, don't be afraid to explore asymmetrical viewpoints that highlight unique angles and perspectives. Combining symmetrical elements with asymmetrical surroundings can also create compelling images.
The Rule of Thirds Applied to Architecture
The rule of thirds is a fundamental compositional guideline that suggests dividing your frame into nine equal parts with two horizontal and two vertical lines. Placing key elements of your composition along these lines or at their intersections can create a more balanced and engaging image. For example, you might position the main subject of your photograph – the building's facade or a prominent architectural feature – along one of the vertical lines.
Using Perspective Control for Straight Lines
Perspective distortion is a common challenge in architectural photography, especially when shooting tall buildings. This distortion causes vertical lines to converge, making the building appear to lean inwards. To correct this, use a tilt-shift lens, or correct in post-processing. Tilt-shift lenses allow you to adjust the angle of the lens relative to the camera sensor, effectively correcting perspective distortion in-camera.
Essential Equipment for Architectural Photography: Cameras, Lenses, and Accessories
Having the right equipment is essential for capturing high-quality architectural photographs. While you can certainly take great photos with a basic camera, investing in specific lenses and accessories can significantly improve your results. Here's a breakdown of recommended equipment:
Best Cameras for Architectural Photography: Full-Frame vs. Crop Sensor
Full-frame cameras offer several advantages for architectural photography, including wider dynamic range, better low-light performance, and the ability to use wide-angle lenses without significant cropping. However, crop sensor cameras can be a more affordable option, and they often offer a slightly extended reach, which can be useful for capturing distant details. Popular full-frame options include the Sony a7 series, Canon EOS R series, and Nikon Z series. Crop sensor options include the Sony a6000 series, Fujifilm X series, and Canon EOS Rebel series.
Wide-Angle Lenses for Capturing Grand Facades
Wide-angle lenses are essential for capturing the entirety of a building's facade, especially in tight spaces. A focal length of 16-35mm is a good starting point for full-frame cameras, while 10-22mm is suitable for crop sensor cameras. Look for lenses with good sharpness and minimal distortion. Some recommended wide-angle lenses include the Canon EF 16-35mm f/2.8L III USM, Sony FE 16-35mm f/2.8 GM, and Nikon NIKKOR Z 14-30mm f/4 S.
Tilt-Shift Lenses for Perspective Correction and Creative Control
Tilt-shift lenses are specialized lenses that allow you to control the perspective and depth of field in your images. They are particularly useful for correcting perspective distortion, ensuring that vertical lines remain straight. Tilt-shift lenses also allow you to selectively focus on specific areas of the building, creating unique and artistic effects. Examples include Canon TS-E 24mm f/3.5L II, Nikon PC-E NIKKOR 24mm f/3.5D ED, and Laowa 20mm f/4 Zero-D Shift.
Tripods for Sharp Images and Stability
A sturdy tripod is essential for architectural photography, especially when shooting in low light or using slow shutter speeds. A tripod will help you maintain sharp focus and prevent camera shake. Look for a tripod that is lightweight, stable, and easy to adjust. Carbon fiber tripods are a good option for their combination of strength and portability. Brands like Manfrotto, Gitzo, and Really Right Stuff are known for their high-quality tripods.
Filters: Polarizing and Neutral Density (ND) Filters for Enhanced Image Quality
Filters can enhance the quality of your architectural photographs by reducing glare, increasing contrast, and allowing you to use longer shutter speeds. A polarizing filter can reduce reflections on glass and water, making the colors more vibrant. A neutral density (ND) filter can reduce the amount of light entering the lens, allowing you to use slower shutter speeds to create motion blur or capture more detail in bright sunlight.
Architectural Photography Settings: Aperture, Shutter Speed, and ISO
Mastering camera settings is crucial for achieving the desired results in architectural photography. Here's a guide to optimal settings for different scenarios:
Aperture for Sharpness and Depth of Field
Aperture controls the amount of light entering the lens and affects the depth of field, which is the area of the image that is in focus. For architectural photography, it's generally best to use a smaller aperture (e.g., f/8 to f/16) to maximize the depth of field and ensure that the entire building is in focus. However, be mindful of diffraction, which can soften the image at very small apertures (e.g., f/22).
Shutter Speed for Sharpness and Motion Blur
Shutter speed controls the amount of time the camera's sensor is exposed to light. For architectural photography, you typically want to use a fast enough shutter speed to avoid camera shake, especially when shooting handheld. A good rule of thumb is to use a shutter speed that is at least equal to the reciprocal of the focal length of your lens (e.g., 1/50th of a second for a 50mm lens). If you are using a tripod, you can use slower shutter speeds to capture more light, especially in low-light conditions.
ISO for Low-Light Performance and Image Noise
ISO controls the sensitivity of the camera's sensor to light. In bright light, you can use a low ISO (e.g., ISO 100) to minimize image noise. In low light, you may need to increase the ISO to achieve a proper exposure. However, be aware that higher ISO settings can introduce more noise into the image. Try to keep the ISO as low as possible while still maintaining a reasonable shutter speed and aperture.
White Balance for Accurate Colors
White balance ensures that the colors in your image are accurate. Different light sources have different color temperatures, which can affect the appearance of colors. Most cameras have automatic white balance settings, but you can also manually adjust the white balance to match the lighting conditions. Shooting in RAW format allows you to adjust the white balance in post-processing without losing image quality.
Architectural Photography Styles: Interior vs. Exterior
Architectural photography can be broadly divided into two categories: interior and exterior. Each style presents unique challenges and opportunities.
Interior Architectural Photography: Lighting, Space, and Details
Interior architectural photography focuses on capturing the details and atmosphere of interior spaces. Lighting is particularly important in interior photography, as it can dramatically affect the mood and feel of the space. Natural light is often preferred, but artificial lighting can also be used to create specific effects. Pay attention to the flow of space and how different elements interact with each other. Capture details such as textures, patterns, and architectural features that contribute to the overall design.
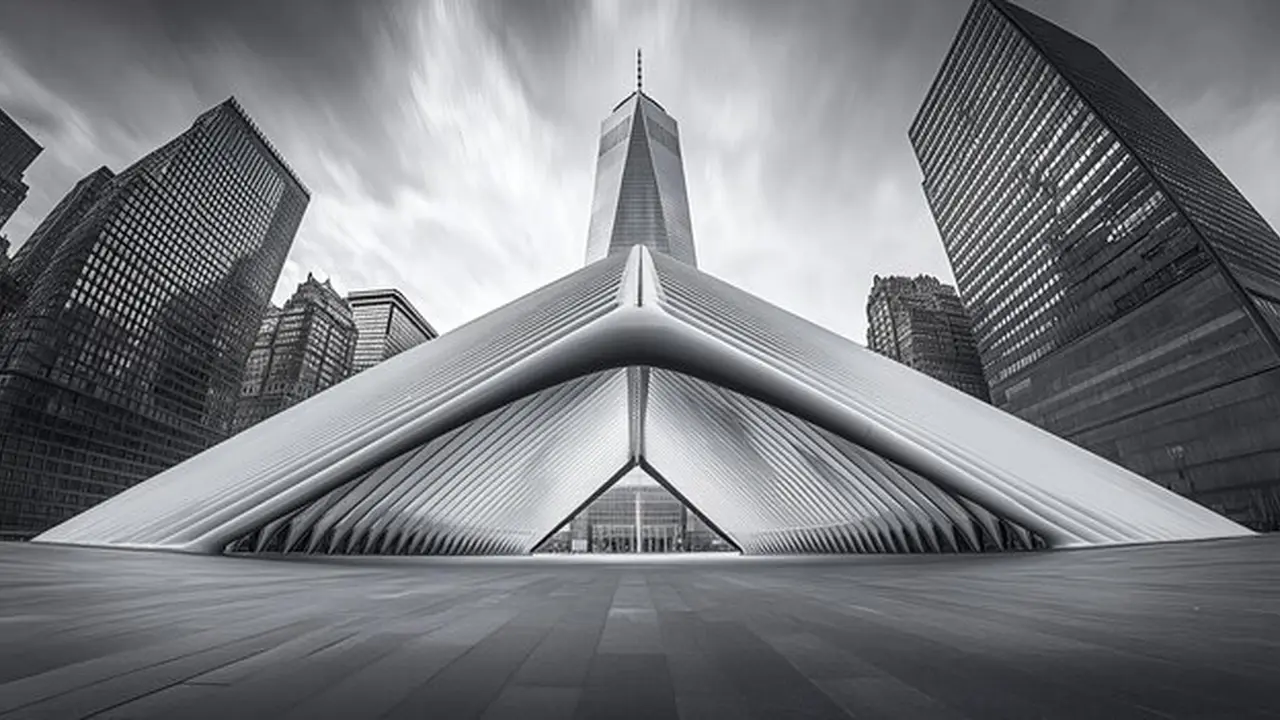
Exterior Architectural Photography: Capturing the Building's Facade and Surroundings
Exterior architectural photography focuses on capturing the building's facade and its relationship to its surroundings. Consider the time of day and the angle of the sun, as these can have a significant impact on the appearance of the building. Look for interesting viewpoints and perspectives that highlight the building's unique features. Pay attention to the surrounding landscape and how it complements the building's design. Consider using wide-angle lenses to capture the entire building in a single frame, or telephoto lenses to isolate specific details.
Post-Processing Techniques for Architectural Photography: Enhancing Your Images
Post-processing is an essential part of the architectural photography workflow. It allows you to enhance your images, correct imperfections, and create a polished final product. Popular software options include Adobe Lightroom and Adobe Photoshop.
Correcting Perspective Distortion in Post-Processing
Perspective distortion can be corrected in post-processing using tools such as the "Transform" panel in Adobe Lightroom or the "Perspective Crop" tool in Adobe Photoshop. These tools allow you to adjust the vertical and horizontal perspective of the image, straightening lines and correcting convergence. Be careful not to over-correct the perspective, as this can make the building look unnatural.
Adjusting Exposure, Contrast, and White Balance
Adjusting the exposure, contrast, and white balance can significantly improve the overall appearance of your architectural photographs. Increase the exposure to brighten the image, decrease the exposure to darken it. Increase the contrast to enhance the difference between light and dark areas, decrease the contrast to soften the image. Adjust the white balance to ensure that the colors are accurate and natural.
Sharpening and Noise Reduction
Sharpening can enhance the details in your image, making it appear more crisp and clear. Noise reduction can reduce the amount of noise in the image, especially in low-light conditions. Use these tools sparingly, as over-sharpening can create unwanted artifacts, and over-reducing noise can make the image appear soft and blurry.
Removing Unwanted Objects and Blemishes
Post-processing can also be used to remove unwanted objects and blemishes from your architectural photographs. Tools such as the "Clone Stamp" and "Healing Brush" in Adobe Photoshop allow you to seamlessly remove distractions such as power lines, people, and imperfections on the building's facade.
Product Recommendations for Architectural Photography
Here are a few specific product recommendations to get you started, covering different price points and use cases:
The Canon TS-E 24mm f/3.5L II Tilt-Shift Lens: Professional Perspective Control
Use Case: Correcting perspective distortion in architectural photography, especially for tall buildings and interiors. Ideal for professional photographers who demand the highest image quality and precise control over perspective and depth of field.
Comparison: The Canon TS-E 24mm f/3.5L II is known for its excellent image quality, sharpness, and build quality. It offers a wide range of tilt and shift movements, allowing for precise control over perspective and depth of field. Compared to other tilt-shift lenses, such as the Nikon PC-E NIKKOR 24mm f/3.5D ED, the Canon is often praised for its superior optical performance and user-friendly design. The Laowa 20mm f/4 Zero-D Shift is a more affordable option, but it may not offer the same level of image quality or precision.
Price: Approximately $2,200 - $2,500 new.
The Sony FE 16-35mm f/2.8 GM Wide-Angle Lens: Versatile and High-Performing
Use Case: Capturing wide-angle views of buildings, interiors, and landscapes. Ideal for photographers who need a versatile lens that performs well in a variety of lighting conditions.
Comparison: The Sony FE 16-35mm f/2.8 GM is a high-performing wide-angle zoom lens that offers excellent image quality, sharpness, and autofocus performance. It is a popular choice among professional photographers who use Sony cameras. Compared to other wide-angle lenses, such as the Tamron 17-28mm f/2.8 Di III RXD, the Sony is more expensive but offers slightly better image quality and build quality. The Sigma 16-28mm f/2.8 DG DN Contemporary is another affordable option that offers good performance for the price.
Price: Approximately $2,000 - $2,300 new.
The Manfrotto 055 Carbon Fiber Tripod: Lightweight and Stable Support
Use Case: Providing stable support for your camera when shooting architectural photographs. Ideal for photographers who need a lightweight and portable tripod that can handle a variety of shooting conditions.
Comparison: The Manfrotto 055 Carbon Fiber Tripod is a popular choice among professional photographers for its combination of lightweight design, stability, and ease of use. Compared to other tripods, such as the Gitzo GT2545T Series 2 Traveler Tripod, the Manfrotto is more affordable but offers similar performance. The Really Right Stuff TVC-24L Versa Series 2 Tripod is a high-end option that offers exceptional stability and build quality, but it is also significantly more expensive.
Price: Approximately $500 - $600 new.
The Benro SHD ND1000 Neutral Density Filter: Long Exposures in Bright Light
Use Case: Allows you to use very slow shutter speeds in bright daylight. Creates dreamy motion blur in clouds and water and removes moving people from your scene.
Comparison: The Benro SHD ND1000 is a high-quality neutral density filter that evenly reduces light across the spectrum. Cheaper filters may introduce color casts or vignette the image. The B+W ND 110 is a comparable high-end filter. Cheaper options exist, but image quality is reduced.
Price: Approximately $100 - $150 depending on size.
:max_bytes(150000):strip_icc()/277019-baked-pork-chops-with-cream-of-mushroom-soup-DDMFS-beauty-4x3-BG-7505-5762b731cf30447d9cbbbbbf387beafa.jpg)