DSLR Camera Cleaning: A Step-by-Step Guide
DSLR cameras are essential tools for photographers, but they require regular cleaning to maintain optimal performance. Dust, dirt, and fingerprints can accumulate on the sensor and lens, affecting image quality. This guide provides a comprehensive step-by-step approach to cleaning your DSLR camera, along with recommendations for cleaning products and best practices. We'll also explore different cleaning kits and their specific uses, helping you choose the right tools for your camera.
So, you've got a DSLR. Awesome! But let's face it, these cameras aren't exactly immune to the elements. Dust, smudges, fingerprints – they all conspire to degrade your image quality. Don't panic! Cleaning your DSLR is easier than you think, and this guide will walk you through it step-by-step. We'll cover everything from basic cleaning supplies to more advanced techniques, ensuring your camera stays in tip-top shape.
Understanding the Importance of DSLR Camera Cleaning and Maintenance
Why bother cleaning your camera? Well, think of it this way: your DSLR is a precision instrument. Tiny particles of dust can wreak havoc on your images, leading to blurry spots, reduced sharpness, and even sensor damage in the long run. Regular cleaning not only improves image quality but also extends the lifespan of your camera.
Ignoring cleaning can lead to:
- Dust Spots: Notice those annoying dark spots in your photos? That's dust on your sensor.
- Reduced Sharpness: Smudges and fingerprints on your lens can soften your images.
- Potential Damage: Abrasive particles can scratch your lens or sensor.
Essential DSLR Camera Cleaning Supplies and Tools
Before you dive in, gather your supplies. You don't need a ton of fancy equipment, but having the right tools makes the job much easier and safer.
- Microfiber Cloths: These are your best friends. Use them for cleaning the camera body, lens, and viewfinder. Make sure they're clean and lint-free.
- Lens Cleaning Solution: Specifically designed for camera lenses. Never use household cleaners!
- Air Blower: A must-have for removing dust and debris without touching the sensor.
- Lens Cleaning Brush: A soft-bristled brush for gently removing dust from hard-to-reach areas.
- Sensor Cleaning Swabs: For cleaning the sensor itself. Use these only when necessary and with extreme caution.
- Cotton Swabs: For cleaning small crevices and buttons.
Product Recommendation: Consider the Giottos Rocket Air Blower. It's powerful, durable, and a favorite among photographers.
Step-by-Step Guide to Cleaning Your DSLR Camera Body
Let's start with the camera body. This is the easiest part, but still important.
- Power Off: Turn off your camera and remove the battery.
- Wipe Down: Use a clean, dry microfiber cloth to wipe down the entire camera body. Pay attention to areas around buttons and dials.
- Clean Crevices: Use a cotton swab to clean hard-to-reach areas, such as the seams around the LCD screen and buttons.
- Clean the Viewfinder: Gently wipe the viewfinder with a microfiber cloth. If it's particularly dirty, use a small amount of lens cleaning solution.
Cleaning Your DSLR Camera Lens: A Detailed Approach
The lens is arguably the most important part of your camera. Keeping it clean is crucial for sharp, clear images.
- Blow Away Loose Debris: Use an air blower to remove any loose dust or particles from the lens surface.
- Brush Away Remaining Dust: Use a lens cleaning brush to gently remove any remaining dust.
- Apply Lens Cleaning Solution: Put a small amount of lens cleaning solution onto a clean microfiber cloth. Never spray directly onto the lens!
- Wipe the Lens: Gently wipe the lens in a circular motion, starting from the center and working your way outwards.
- Dry the Lens: Use a clean, dry section of the microfiber cloth to dry the lens.
Product Recommendation: Consider the Zeiss Lens Cleaning Kit. It includes everything you need to keep your lenses sparkling clean.
DSLR Camera Sensor Cleaning: When and How to Do It Safely
Sensor cleaning is the most delicate part of the process. Only clean your sensor when absolutely necessary, and always proceed with caution.
When to Clean Your Sensor: You'll know your sensor needs cleaning when you see persistent dust spots in your photos, even after cleaning the lens.
How to Clean Your Sensor:
- Engage Sensor Cleaning Mode: Most DSLRs have a sensor cleaning mode that locks the mirror up and exposes the sensor. Consult your camera's manual for instructions.
- Use Sensor Cleaning Swabs: Carefully insert a sensor cleaning swab into the camera and gently swipe it across the sensor from one side to the other.
- Repeat if Necessary: Use a fresh swab for each swipe. You may need to repeat the process a few times to remove all the dust.
- Exit Sensor Cleaning Mode: Once you're finished, exit sensor cleaning mode and turn off your camera.
Important Note: Sensor cleaning carries a risk of damaging your sensor. If you're not comfortable doing it yourself, consider taking your camera to a professional cleaning service.
Product Recommendation: Consider the VisibleDust Sensor Cleaning Kit. It includes high-quality swabs and cleaning solution designed for DSLR sensors.
Choosing the Right DSLR Camera Cleaning Kit: A Comparison of Options
With so many cleaning kits on the market, choosing the right one can be overwhelming. Here's a comparison of a few popular options:
- Zeiss Lens Cleaning Kit: A great all-around kit for lens cleaning. Includes cleaning solution and microfiber cloths. Price: $20-$30
- Giottos Rocket Air Blower: A powerful air blower for removing dust and debris. Price: $15-$25
- VisibleDust Sensor Cleaning Kit: A comprehensive kit for sensor cleaning. Includes swabs and cleaning solution. Price: $50-$70
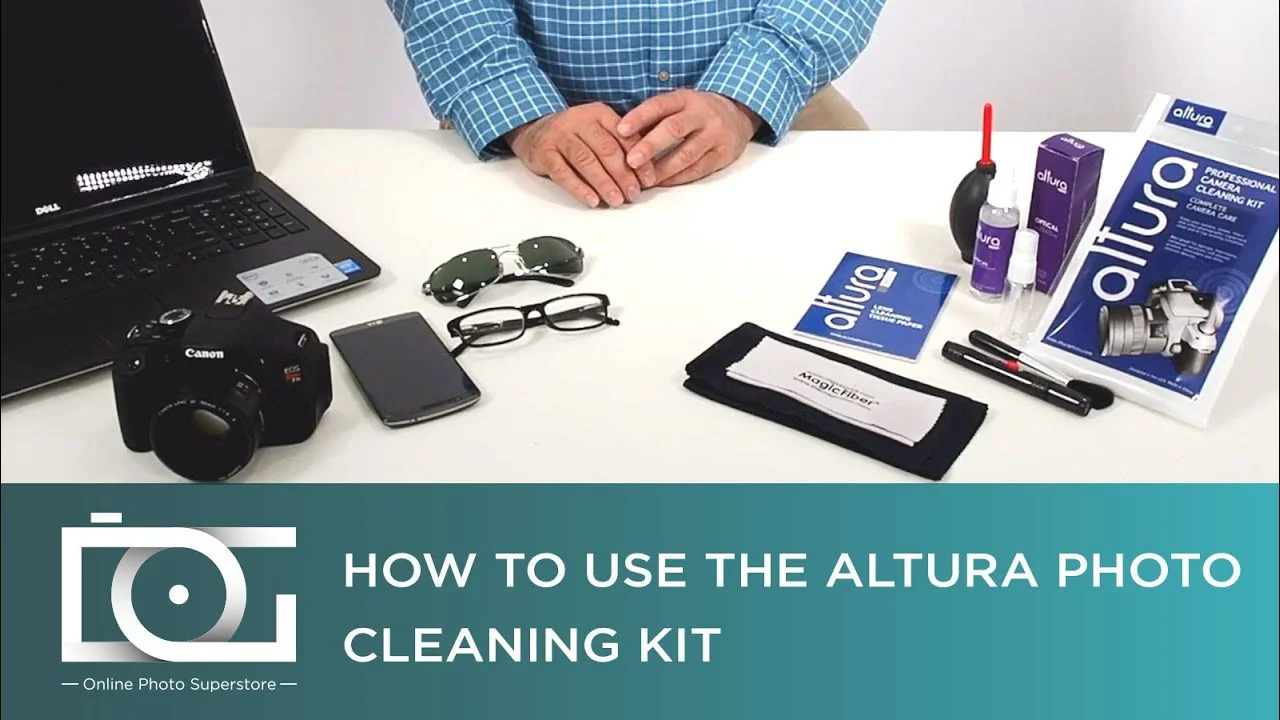
- Altura Photo Professional Cleaning Kit: A budget-friendly option that includes a variety of cleaning tools. Price: $15-$25
Consider your needs and budget when choosing a cleaning kit. If you only need to clean your lenses, a basic lens cleaning kit is sufficient. If you plan to clean your sensor regularly, invest in a dedicated sensor cleaning kit.
DSLR Camera Cleaning Frequency: How Often Should You Clean?
How often you clean your camera depends on how often you use it and the environments you shoot in. Generally, you should clean your lens after each use, especially if you've been shooting outdoors. The camera body can be cleaned less frequently, perhaps once a month or as needed. Sensor cleaning should be done only when necessary, as it carries a higher risk of damage.
Here's a general guideline:
- Lens: After each use, especially after shooting outdoors.
- Camera Body: Once a month or as needed.
- Sensor: Only when necessary, when dust spots become noticeable in your photos.
Specific Product Recommendations for DSLR Camera Cleaning
Let's dive into some specific product recommendations and their ideal use cases:
* **Giottos Rocket Air Blower:** *Use Case:* Indispensable for blowing away loose dust and debris from lenses, sensors, and camera bodies before any wiping. *Why it's great:* Powerful, durable, and doesn't require compressed air, making it safe for sensitive components. *Price:* \$15-\$25. * **Zeiss Lens Cleaning Kit:** *Use Case:* Perfect for daily lens cleaning. *Why it's great:* The solution is gentle yet effective, and the microfiber cloths are high quality and lint-free. *Price:* \$20-\$30. * **VisibleDust Sensor Cleaning Kit:** *Use Case:* For those times when dust spots are stubbornly clinging to your sensor. *Why it's great:* Includes specialized swabs and solutions specifically designed for sensor cleaning, minimizing the risk of damage. *Price:* \$50-\$70. *Note:* Requires careful technique and following instructions precisely. * **Altura Photo Professional Cleaning Kit:** *Use Case:* An affordable all-in-one kit for basic cleaning needs. *Why it's great:* Includes a range of tools like brushes, cloths, and a cleaning solution, offering good value for the price. *Price:* \$15-\$25. *Note:* The quality of the individual components might not be as high as more premium kits.Comparing DSLR Cleaning Products: Making the Right Choice
Choosing between different cleaning products can be tough. Here's a quick comparison:
* **Air Blowers:** *Giottos Rocket Air Blower vs. Canned Air:* Air blowers are reusable and safer for the environment. Canned air can contain propellants that can damage your sensor. * **Lens Cleaning Solutions:** *Zeiss vs. Generic Solutions:* Zeiss is a trusted brand with a gentle formula. Generic solutions may contain harsh chemicals that can damage your lens coating. * **Sensor Cleaning Swabs:** *VisibleDust vs. Generic Swabs:* VisibleDust uses high-quality materials and precise manufacturing to minimize the risk of scratching the sensor. Generic swabs may be poorly made and can leave behind residue.DSLR Cleaning: Common Mistakes to Avoid
Even with the best intentions, it's easy to make mistakes when cleaning your DSLR. Here are a few common pitfalls to avoid:
- Using Household Cleaners: Never use household cleaners on your camera or lenses. They can damage the coatings and delicate components.
- Spraying Cleaning Solution Directly on the Lens: Always apply cleaning solution to a microfiber cloth first.
- Using Dirty Cloths: Make sure your microfiber cloths are clean and lint-free. Dirty cloths can scratch the lens.
- Applying Too Much Pressure: Be gentle when cleaning your camera. Applying too much pressure can damage the sensor or lens.
- Cleaning the Sensor Too Often: Only clean the sensor when necessary. Frequent cleaning can increase the risk of damage.
DSLR Camera Cleaning in Different Environments and Shooting Scenarios
The environment you're shooting in can significantly impact how often you need to clean your camera. Here's how to adapt your cleaning routine for different situations:
* Shooting at the Beach: Sand and salt spray are particularly damaging. Clean your camera thoroughly after each beach shoot. Use an air blower to remove sand particles before wiping. * Shooting in Dusty Environments: Dust can quickly accumulate on your camera and lens. Clean your camera frequently and consider using a lens filter to protect the front element. * Shooting in Humid Environments: Humidity can lead to fungus growth on your lens. Store your camera in a dry place and use a dehumidifier if necessary. * Shooting in Cold Weather: Condensation can form on your lens when moving from a cold environment to a warm environment. Allow your camera to warm up gradually before using it.The Cost of DSLR Camera Cleaning Services: Is it Worth It?
If you're not comfortable cleaning your camera yourself, you can always take it to a professional cleaning service. The cost can vary depending on the service and the level of cleaning required.
Here's a general price range:
- Lens Cleaning: $20-$50
- Sensor Cleaning: $50-$150
Whether it's worth it depends on your budget and your comfort level. If you're worried about damaging your camera, professional cleaning is a good option. However, with the right tools and techniques, you can easily clean your camera yourself and save money.
So there you have it! A comprehensive guide to cleaning your DSLR camera. Remember, regular cleaning is essential for maintaining image quality and extending the life of your camera. With the right tools and techniques, you can keep your camera in top-notch condition and capture stunning photos for years to come.
:max_bytes(150000):strip_icc()/277019-baked-pork-chops-with-cream-of-mushroom-soup-DDMFS-beauty-4x3-BG-7505-5762b731cf30447d9cbbbbbf387beafa.jpg)