Batch Editing in Lightroom: Editing Multiple Photos at Once
Lightroom batch editing can save you a ton of time when processing large sets of photos. This guide dives deep into how to batch edit in Lightroom, covering everything from basic syncing to advanced techniques, and even recommending specific hardware and software to boost your workflow. Learn how to streamline your editing process and get your photos looking their best, faster.
So, you've got a ton of photos to edit. Don't panic! Lightroom's batch editing features are here to save the day. Instead of painstakingly tweaking each image individually, you can apply the same adjustments to multiple photos at once. Let's get into how it works and how to make the most of it.
Understanding Lightroom Batch Editing Basics: Syncing Settings
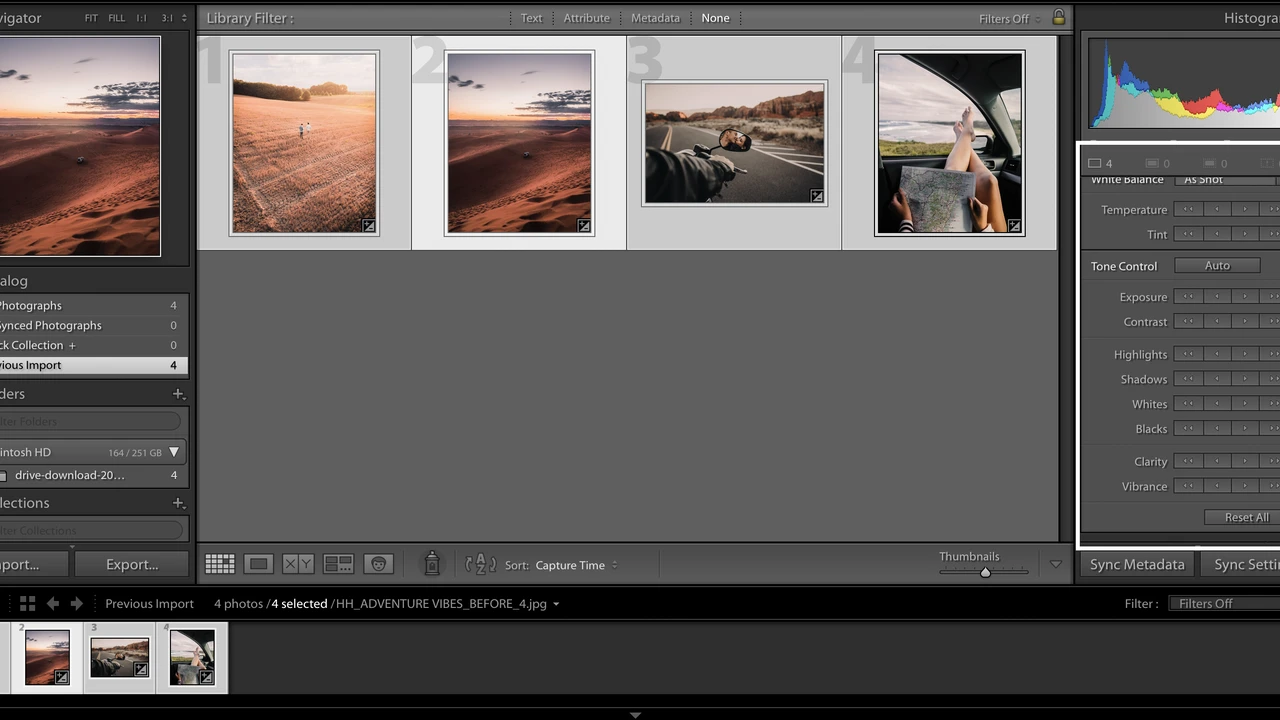
The most fundamental aspect of batch editing is syncing settings. This allows you to copy adjustments from one "source" photo to selected "target" photos. Here's how it works:
- Select Your Source Photo: This is the photo with the adjustments you want to copy.
- Select Your Target Photos: These are the photos you want to apply the adjustments to. You can select multiple photos by holding down the Shift or Ctrl/Cmd key while clicking.
- Sync Settings: Go to Develop > Sync Settings... (or press Shift+Ctrl/Cmd+S). A dialog box will appear.
- Choose Your Settings: Select the specific adjustments you want to sync. You can choose everything from exposure and white balance to tone curves and HSL adjustments. If you're only syncing basic adjustments, uncheck everything else for a cleaner process.
- Sync: Click the "Synchronize" button.
Lightroom will then apply the selected adjustments from the source photo to all the target photos. Boom! Instant consistency.
Advanced Batch Editing Techniques: Auto Sync and Presets
Want to take batch editing to the next level? Let's talk about Auto Sync and Presets.
Auto Sync for Real-Time Adjustments
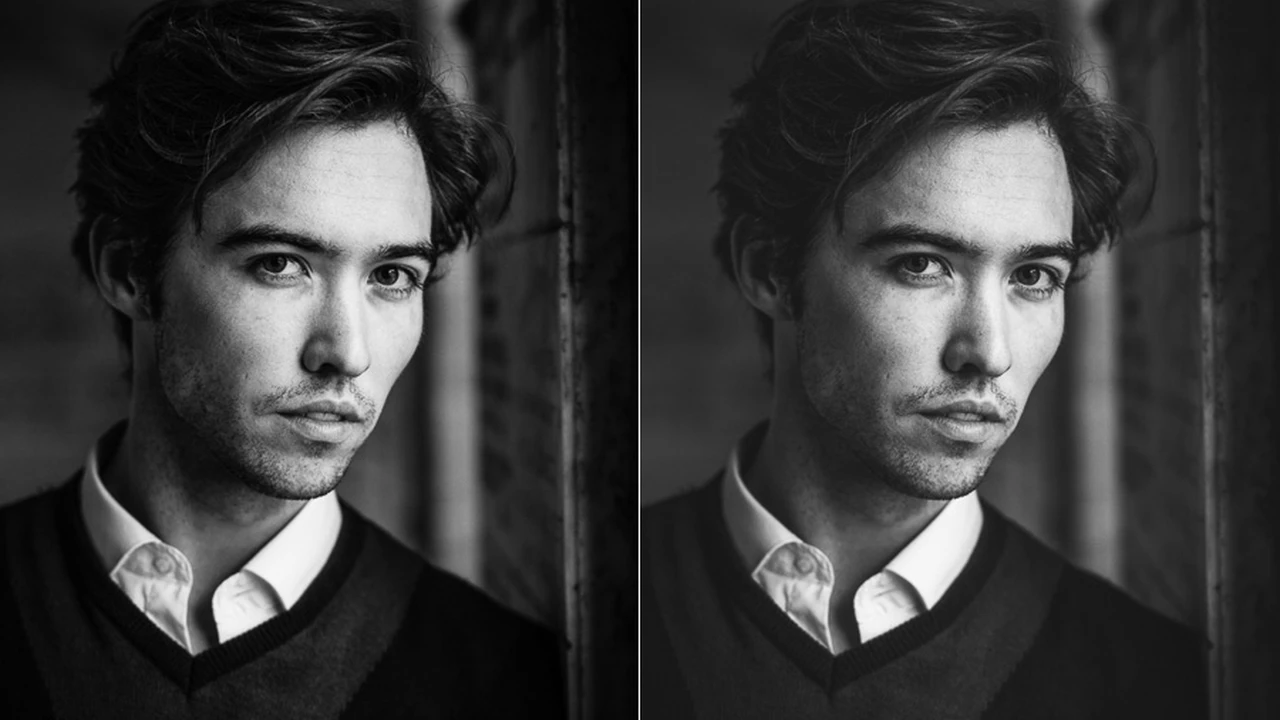
Auto Sync is a powerful feature that automatically applies adjustments to all selected photos as you make them on the source photo. To enable it, click the "Sync" button in the Develop module (it will change to "Auto Sync"). Now, any adjustment you make to the selected photo will be instantly applied to all other selected photos. This is great for situations where you want to maintain a consistent look across a series of very similar photos, like a sequence of portraits shot in the same lighting conditions. Be careful though! Auto Sync is a powerful tool, but can easily lead to unwanted changes if you're not paying attention.
Presets: Your Secret Weapon for Consistent Styles
Presets are saved sets of adjustments that you can apply to photos with a single click. They're incredibly useful for batch editing because you can create a preset that reflects your desired style and then apply it to hundreds of photos in seconds. Here's how to create and use presets:
- Create Your Adjustments: Adjust one photo to your liking.
- Save as a Preset: In the Develop module, click the "+" icon next to "Presets" in the left panel. Choose "Create Preset."
- Name Your Preset: Give your preset a descriptive name.
- Choose Settings to Include: Select the specific adjustments you want to include in the preset. Again, less is often more. Focus on the core adjustments that define your style.
- Apply the Preset: Select the photos you want to edit and click on your preset in the Presets panel.
You can also download and install presets created by other photographers. Many free and paid presets are available online. Experiment to find styles that you love and adapt them to your own work.
Specific Products for Efficient Lightroom Batch Editing: Hardware and Software Recommendations
Let's talk about gear. Having the right hardware and software can significantly speed up your batch editing workflow.
The Power of a Fast Processor and Ample RAM: Computer Hardware
Lightroom is a resource-intensive application. If you're dealing with large batches of photos, a powerful computer is essential. Here's what to look for:
- Processor: An Intel Core i7 or i9 processor (or AMD Ryzen equivalent) is highly recommended. The more cores, the better.
- RAM: 16GB of RAM is a good starting point, but 32GB or more is ideal for large batches of high-resolution images.
- Storage: A fast SSD (Solid State Drive) for your operating system, Lightroom, and your working files will make a huge difference in performance. Consider an NVMe SSD for even faster speeds. A separate large capacity HDD or SSD for archiving completed projects.
- Graphics Card: While Lightroom doesn't rely heavily on the GPU, a dedicated graphics card (like an NVIDIA GeForce or AMD Radeon) can improve performance, especially when using features like noise reduction.
Product Recommendations:
- Apple iMac 27-inch (with Retina 5K display): A powerful all-in-one option with a beautiful display. Prices start around $1800.
- Custom-Built PC: Building your own PC allows you to tailor the components to your specific needs and budget. You can often get more performance for your money this way. Expect to pay $1500 - $3000+ depending on the components.
- Dell XPS Desktop: A solid pre-built option that offers a good balance of performance and price. Prices start around $800 but can be configured with high-end components.
Beyond Lightroom: Editing Software and Plugins
While Lightroom is a fantastic tool for batch editing, there are other software options and plugins that can further enhance your workflow.
- Capture One: A professional-grade photo editing software that is known for its superior color handling and tethering capabilities. It's a powerful alternative to Lightroom, especially for studio photographers. Capture One offers both subscription and perpetual license options, ranging from $20/month to $300.
- Luminar AI/Neo: A user-friendly photo editor that uses AI-powered tools to simplify complex editing tasks. It's a great option for beginners or those who want to quickly enhance their photos. Luminar Neo offers a subscription or a lifetime license for around $150.
- Nik Collection by DxO: A suite of powerful plugins for Lightroom and Photoshop that offer a wide range of creative effects and editing tools, including noise reduction, sharpening, and color grading. The Nik Collection costs around $150.
Choosing the Right Gear for Your Workflow: Comparing Options
When choosing hardware and software, consider your specific needs and budget. Here's a quick comparison:
| Product | Pros | Cons | Price | Best For |
|---|---|---|---|---|
| iMac 27-inch | All-in-one, beautiful display, powerful | Expensive, limited upgradeability | $1800+ | Photographers who want a simple, elegant solution |
| Custom-Built PC | Highly customizable, best performance for the price | Requires technical knowledge, can be time-consuming to build | $1500 - $3000+ | Tech-savvy photographers who want maximum performance |
| Dell XPS Desktop | Good balance of performance and price, pre-built | Less customizable than a custom-built PC | $800+ | Photographers who want a reliable, pre-built option |
| Capture One | Superior color handling, excellent tethering | Steeper learning curve, more expensive than Lightroom | $20/month or $300 | Professional photographers who need the best possible color accuracy |
| Luminar AI/Neo | Easy to use, AI-powered tools | Less control than Lightroom or Capture One | $150 (Lifetime) | Beginners or photographers who want quick and easy edits |
| Nik Collection by DxO | Powerful plugins, wide range of creative effects | Can be overwhelming, requires Lightroom or Photoshop | $150 | Photographers who want to expand their creative options |
Optimizing Lightroom for Batch Editing: Performance Tweaks
Even with powerful hardware, you can still optimize Lightroom's performance for batch editing. Here are a few tips:
- Increase Camera Raw Cache Size: Go to Lightroom Preferences > Performance and increase the Camera Raw Cache Settings. This will allow Lightroom to store more image data in memory, reducing the need to access the hard drive.
- Generate Standard-Sized Previews: When importing photos, choose "Standard" or "1:1" previews. This will create larger previews that Lightroom can use for faster browsing and editing.
- Optimize Catalog: Periodically optimize your Lightroom catalog by going to File > Optimize Catalog. This will help to keep your catalog running smoothly.
- Close Unnecessary Applications: Close any applications that you're not using to free up system resources.
- Use Smart Previews for Offline Editing: If you're editing photos on a laptop without access to your external hard drive, use Smart Previews. These are smaller, lower-resolution versions of your photos that allow you to edit them offline.
Batch Editing Workflow Examples: Real-World Scenarios
Let's look at some practical examples of how to use batch editing in different scenarios.
Editing a Wedding Shoot: Maintaining Consistency Across Hundreds of Images
Wedding photographers often shoot hundreds or even thousands of photos at each event. Batch editing is essential for maintaining a consistent look and feel across the entire collection. Here's a workflow:
- Cull Your Images: First, go through all the photos and select the best ones.
- Edit a Representative Image: Choose one photo that is well-exposed and has good composition. Edit this photo to your liking, creating your desired style.
- Create a Preset: Save the adjustments from your edited photo as a preset.
- Apply the Preset to All Images: Select all the photos you want to edit and apply the preset.
- Fine-Tune Individual Images: Go through each image and make any necessary adjustments to exposure, white balance, or other settings. Use Auto Sync for sequences of similar photos.
Editing a Landscape Series: Creating a Cohesive Look
Landscape photographers often shoot a series of photos in the same location and lighting conditions. Batch editing can help to create a cohesive look across the entire series. Here's a workflow:
- Select Your Best Images: Choose the photos that best represent the scene.
- Edit a Key Image: Edit one photo to your liking, focusing on color grading, contrast, and detail.
- Sync Settings: Sync the settings from your key image to the other photos in the series.
- Adjust for Specific Conditions: Make small adjustments to individual images to account for variations in lighting or composition.
Troubleshooting Common Batch Editing Issues: What to Do When Things Go Wrong
Sometimes, batch editing doesn't go as planned. Here are some common issues and how to troubleshoot them:
- Inconsistent Lighting: If your photos were shot in different lighting conditions, syncing settings can lead to unexpected results. In this case, you'll need to make more individual adjustments.
- Overexposed or Underexposed Images: If some of your photos are significantly overexposed or underexposed, syncing settings may not be effective. You'll need to adjust the exposure individually for these images.
- Incorrect White Balance: If your photos have different white balance settings, syncing settings can lead to color casts. You'll need to adjust the white balance individually for these images.
- Performance Issues: If Lightroom is running slowly, try optimizing your catalog, increasing the Camera Raw cache size, and closing unnecessary applications.
Batch Exporting Your Edited Photos: Preparing for Delivery
Once you've finished editing your photos, you'll need to export them for delivery. Lightroom offers a variety of export options to suit different needs.
- Select Your Export Settings: Go to File > Export.
- Choose Your Export Location: Select the folder where you want to save your exported photos.
- Choose Your File Naming Convention: Use a consistent file naming convention to help you organize your photos.
- Choose Your File Format: Select the file format that is appropriate for your needs. JPEG is a good option for general use, while TIFF is a better option for printing.
- Adjust Image Size and Quality: Adjust the image size and quality settings to balance file size and image quality.
- Add Metadata: Add metadata to your photos, such as copyright information and keywords.
- Export: Click the "Export" button.
:max_bytes(150000):strip_icc()/277019-baked-pork-chops-with-cream-of-mushroom-soup-DDMFS-beauty-4x3-BG-7505-5762b731cf30447d9cbbbbbf387beafa.jpg)